Tuesday, November 19, 2013

Family History Jar

Pin It
Sneek Peak!
The Thanksgiving Holiday is approaching very fast. This happens to be one of my favorite Holidays. I love it!

 A few weeks ago, I was thinking about doing a fun family activity that would hopefully get the family and the children excited about their family history.

As I looked around and thought some more, I came across this idea from musings from mommyland. It was a jar with family history questions inside. Though hers was made the traditional way, which was still very cute, I wanted to make mine more simply and without making a trip to the craft store.

I created a template within Heritage Collector that all you have to do is print, cut, fold your paper flowers and glue. Very simple, yet very cute.

This isn't the greatest picture. I will post more in a week.
 
The idea for this jar  is to first select an ancestor and someone to take notes. Start passing this jar around the table and have each family member, and yes the kids, too, pull out a question. Then together, the family will answer the question and have the one selected to take notes or even have a recorder going.
 
Here is a list I made up if you need some ideas on questions to ask.
 
 
When you make your own, you could simply print this right from home, cut into strips, fold and place inside your jar. This puts a fun twist on family history!
 
Once we complete ours, I will post more pictures and information about our experience. If you would like the above template, please contact me.
 
If you need help on how to fold the paper flower, see this blog.
 
Thanks for reading and have fun making your own family history jar!
 
View the free recorded class on how to do this here.


Saturday, September 21, 2013

Children Saturday Job List. Free Printable

Pin ItHappy Saturday! I hope you all are having a great weekend! Sometimes, I wish Saturday would last about two days so I could put a dent in my eternal to list!

Today's post is an exciting one for me. Like any young mother with children just learning to take some responsibility around the home can be a bit challenging and frustrating.

Over the past year or so, I have been slowly giving my young children some simple jobs to do around the house. I started out by just writing a simple list on some paper for each child and checking them off once completed.

One thing I learned rather quickly was that the Saturday job list was a bit different than the job list during the week. Saturday is when the home gets more of the deep cleaning done. Therefore, I needed more help from my children. After all, I am not the only one that lives here, right? I tell my children all the time that our family is a team working together to keep our home clean. Mom, isn't (or shouldn't) be doing all of the cleaning around the home.

The past several months I have been brainstorming about a way that I could come up with something that would help my children get their jobs done in a timely manner on Saturday so they can have plenty of time for play. And also, feel some sense of responsibility for their jobs.

This is what I came up with!


 A laminated Saturday Job list on a clip board my kids can carry around the house. I included a dry erase marker to each one of them so they can check the jobs off as they go.


I did add some cute ribbon to dress it up a bit.


Simple instructions:
  • Print and cut out the printable on card stock.
  • Laminate the printable. ( I used the clear contact paper, super easy, less expensive and I didn't have to leave the house!)
  • Place the printable on the clip board, add some ribbon and a dry erase marker, and there you have it!!
The clip boards were about $1.25 a piece. This entire project cost about $3 including the dry erase marker.

 
Boy Saturday Job Chart

 
Girl Saturday Job Chart
 
 
Simply click on the image. Do a save as, then print as an 8.5 x 11.
 
Print and enjoy!
 
Thanks for visiting today. Come back soon.


Wednesday, September 18, 2013

The Homework Helper!


Pin It

Okay, so where did the summer go? For us over here in Utah, the leaves are changing, and, the air is getting more and more crisp in the mornings. This could only mean one thing, Fall is on the way!
 This is one of my favorite times of the year. For many reasons. Spending time in the mountains enjoying the stunning landscape, fishing from a bank of a river soaking in the beauty all around, and enjoying looking at wildlife through the lenses of my binoculars.

Now your probably wondering why I chose the post title to be the homework helper. Right? Well, because fall is in full swing around here, so is back to school and the dreaded word (at least for me) HOMEWORK.

I enjoy nothing more than parking outside my children's school anxiously waiting for them to come out to the car and greet me with a smile and a kiss. I can't wait to have my kids home! I've missed them all day! My feelings quickly turn to frustration once we get home,  the nagging starts to keep my children on task and to get their homework done before play.

Many of you have probably seen some different spins on "the homework helper" Maybe Pinterest, or just doing a Google search. So, I can't take complete credit for it. Just for my spin on it. :)

This is what I came up with just by walking aimlessly around the Dollar Store trying to come up with the perfect getting homework done, solution.


This was my supply list.
  • A plastic bucket to hold all of the supplies
  • Name tag for each child
  • Scissor
  • Glue Sticks
  • Erasers
  • Pencil sharpener
  • Crayons
  • Pencil and eraser holder
  • And of course a SNACK!
When school began for my children a few weeks ago and the homework started, I quickly learned that part of the problem with my frustration was my kids constant fighting over the supplies to complete their homework.
 
This was my PERFECT solution!!
 
By adding a name tag and a special snack inside, my kids actually get excited to take their homework helper to their designated homework spot, and get working!


You don't have to get crazy with the snacks. All I do is simply cut up an apple or another piece of fruit, place in a plastic baggie, put inside the homework helper and set on the counter for easy access once the kids get home from school. You could even put fruit snacks in there. You have many options. I've just found that by adding the snack before hand, allows for more time for me to make sure they are getting a nutritious snack and I don't have to prepare it while trying to help with homework. And, it only takes five minutes or so.
 
Thanks for reading this post! Stop by again soon! -Kathleen


Thursday, September 12, 2013

Proper Care and Handling of CD's and DVD's

Pin It

Saving Your Bacon”

I got permission from the "Wizard" Marlo Schuldt to share some amazing tips on Preserving your CD's and DVD's. You will find these tips eye opening and very interesting!

Over the years I’ve had some ‘almost’ tragic experiences losing information and digital images. Fortunately I had multiple backups on different kinds of media and devices that saved my bacon.
I’m writing today to help save your bacon and protect you from yourself. I’m guessing you are like many people I speak with via the phone or at family history conventions. Unfortunately you may have acquired some bad habits over the years. Worst of all, you thought you were doing the right thing by protecting the reflective side of your CDs. Oops!

First of all, let’s shed some light on a few myths.

  1. There’s no perfect medium for preserving information and photos unless you can afford to write and record on gold, stainless steel or stone.
  2. All the archival media of today have trade offs. CDs, DVDs, Blu ray, hard drives, flash drives (have the lowest life time expectancy and are meant for temporary storage), tape drives etc. Each has a vulnerability for future destruction, failure or data loss. Not to mention having no access in the future to a device that can read or “play” the media. Here’s an example. Do you have any old 8-track tapes? Do you have an 8-track player? Ah haw! I got you there. So without the player you can’t play any of the tapes making your old tapes worthless and inaccessible no mater how well preserved. Do you know a friend with an 8-track player? That would be me. However, as time marches on, access to old technology will become impossible and the old device may not work anymore.

What’s the Best Archival / Storage Method?

Let’s be very clear and realistic – there is no single, best method for archiving and preservation. My recommendation is somewhat simple.
  • Use different kinds of media.
  • Create multiple copies that are stored in different locations outside your home.
Why? A flood, fire, earthquake, theft or other natural disaster could wipe out ALL your family history in seconds. Sharing your photos and information is the BEST survival strategy.
Please refer to my newsletter for an interesting perspective on preserving and archiving. Following the simple recommendations in this newsletter will assure your photos and family history will be backed up and preserved using the latest and most sophisticated technology. Best of all, it won’t cost you a dime to utilize this preservation strategy.
You should also consider learning how to embed photo information directly into the photo file (IPTC) so information will survive with the file into the future. It’s doesn’t do much good to go to all this work to preserve photos without any identifying and associated information. See this newsletter.

CD/DVD Do’s and Don’ts


Protect the correct side of the CD. It’s NOT the reflective side. Trust me and read on. Protect the label side of the CD from scratches and abuse. Any damage to the label side may destroy the information on the CD. If you must lay the CD next to your computer, lay it down with the reflective side up!!
Don’t Write on a CD. The acid in the ink will eat through the thin layer of protective coating. The pressure applied while writing with a ballpoint pen may damage or pierce the surface coating. Always use pens that are made specifically for writing on CDs. You can find these at any office supply or stationary section of a department store.
Never Put Post-It Notes or labels on a CD. Once a I put a post-it note on a CD. A week later when I removed the post-it note and part of the reflective coating came off with the note. However, all was not lost since the CD made a nice drink coaster.

Labeling CDs? I admit it – I’m paranoid. I never put any kind of a label on a CD. One fear is it may cause the CD to wobble in the drive which makes it impossible for the drive to read the CD. This is kind of like the wheel on your car vibrating at high speed because the tire is out of balance as it spins.
Never Put a Partial Label on a CD. If you must use a paper label select from a high quality brand. I’d never put any paper labels on a CD to use for archival purposes. I prefer to create colorful jewel case insert for a CD/DVD I’m sharing.
Protect the Reflective Surface of a DVD. Just when you thought you had a one size fits all strategy for protecting CDs I throw this next curve at you.
Protecting a DVD is the opposite of CD. Unlike a CD, a DVD has two layers of plastic so you don’t need to worry about protecting the label side of a DVD. You need to protect the reflective side. Why? Because a DVD uses smaller dots to record the information which is why they hold more data than a CD. However, scratches on the reflective side of a DVD are much more serious than a CD. In other words, a few small scratches on the reflective side of a DVD may be the kiss of death when trying to access anything stored on the DVD.
Protect BOTH Sides of a CD/DVD. This is obvious. I added this so I would not be embarrassed by some sending feedback Titled – “Well Duh, you should protect both sides dummy!”
Proper Storage of CD/DVDs. Just like the old vinyl music records of past years, store your CD/DVDs in a protective plastic jewel case standing on its edge in a dark, cool dry place. The plastic and coating used may age when DVDs and CDs are left out in the sun. Even ambient room light can deteriorate the surface of CD/DVDs.
Use Archival Quality CD/DVDs. Consider purchasing “gold” archival DVDs. Why use an expensive CD? A CD holds less information. The cost of archival DVDs will be less than the cost of using archive CDs. Just because it looks like it’s gold doesn’t make it a gold archival quality CD/DVD. Read the CD/DVD specification to be sure it is an archival quality CD/DVD.
You can find more information about preservation in the book written by Marlo Schuldt,
Digital Family History Guidebook 

Download the FREE standard version here.

Thanks for stopping by! I hope you were able to learn something from these amazing tips from Marlo!

-Kathleen

Tuesday, September 10, 2013

Family History, Family Activity.

Pin It

Make Family History a fun Experience for your children
For those of you that know me, know that I have a deep passion for family history. I love it! Sometimes I feel a thirst for it. One of my dreams as a mother is that my children will too have a deep love for their history.

As a young mother, I feel it an incredibly important responsibility to teach my children about their family history and ancestors. To help achieve this, I have decided to take one Monday night out of each month and dedicate it to a family history lesson for my children. Once a month my family will have the privilege to learn about an ancestor from either mine, or my husband's side of the family.

In today's post I am going to share the family history activity we participated in last night. We decided to spotlight the children's great grandmother on my side of the family.

A few days ago when I decided to teach my children of their great grandmother Mary, the ideas just started flowing into my mind! I couldn't wait to share and teach about this incredible person, I was privileged to have in my life as a young girl.

We started out our evening with a fun song to help the children get their wiggles out, and be ready to participate in a night full of fun.

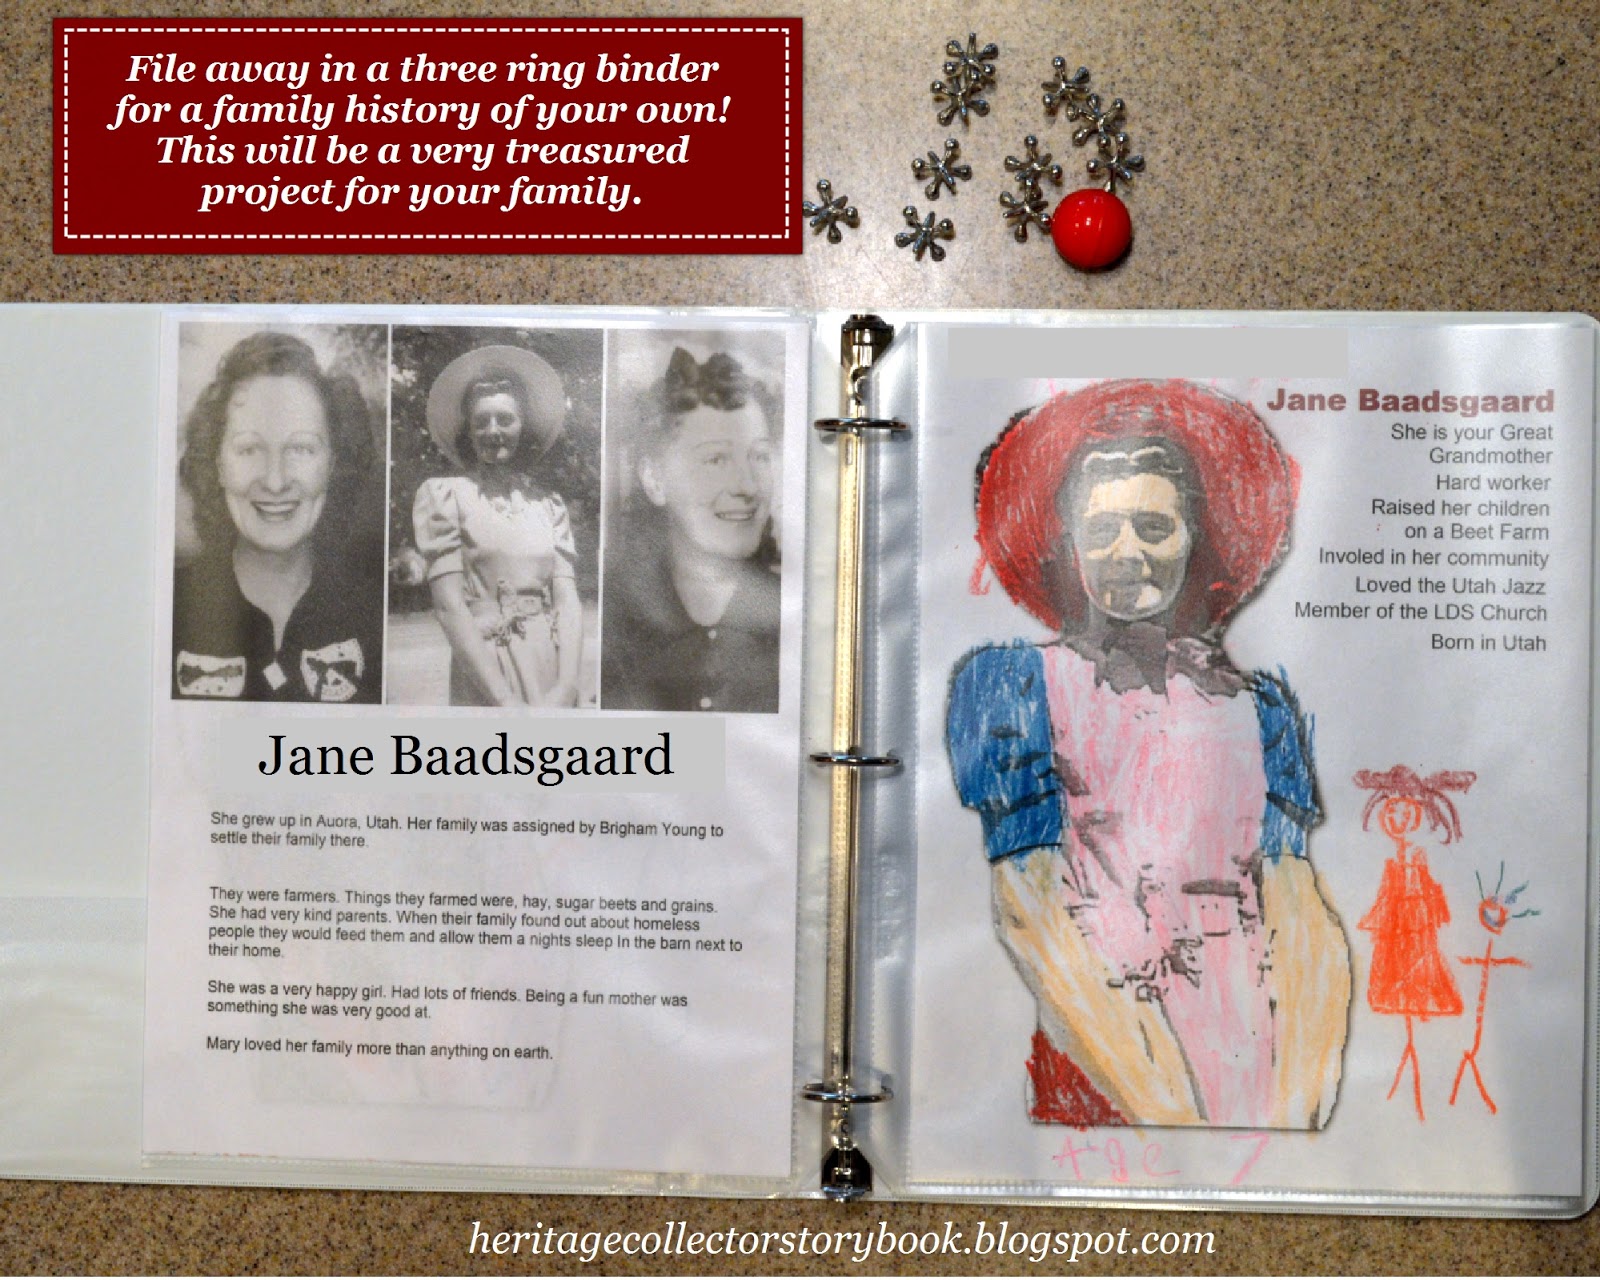
After the song, I held up a few pictures of my grandmother, introduced her, and gave a five minute description of her and how she grew up on a farm.

I was amazed at my children's attention,  how they asked questions, stayed interested, and wanted to learn more.

Next, we gathered at the kitchen table to color a picture of what they thought their grandma Mary looked like. (Making a coloring page is extremely easy to do!) (I just selected a nice picture of Mary, cut out the background, brightened it a little, then turned up the sharpness. Then printed few copies. It only took about 10 minutes to make.)


My kids were really getting into this activity. My oldest son, even drew  himself next to his great grandmother and said to me "mom, this is me standing next to my great grandma. I think she would like this". I can't tell you in words how this made me feel.


Next, we were onto another activity, playing Jacks. This was one of great Grandma Mary's favorite games.
As we pulled out all of the pieces of the game,  placed them on the floor, my children's eyes were lit up with total excitement! They couldn't wait to learn this "new" game. Which they soon learned  was a very old game, and their great grandma played it too, when she was their age.


I felt like this activity was a total success! I heard my children speak of their grandmothers name many times during our activities! Even my two year old twin boys spoke of her.

Family history is something that needs to be taught to our children. Our ancestors have stories that need to be told and shared. They have experiences that were faced that changed lives during their time on earth and can continue to changes lives after they've passed on. It's our responsibility to make sure their Legacy never dies!


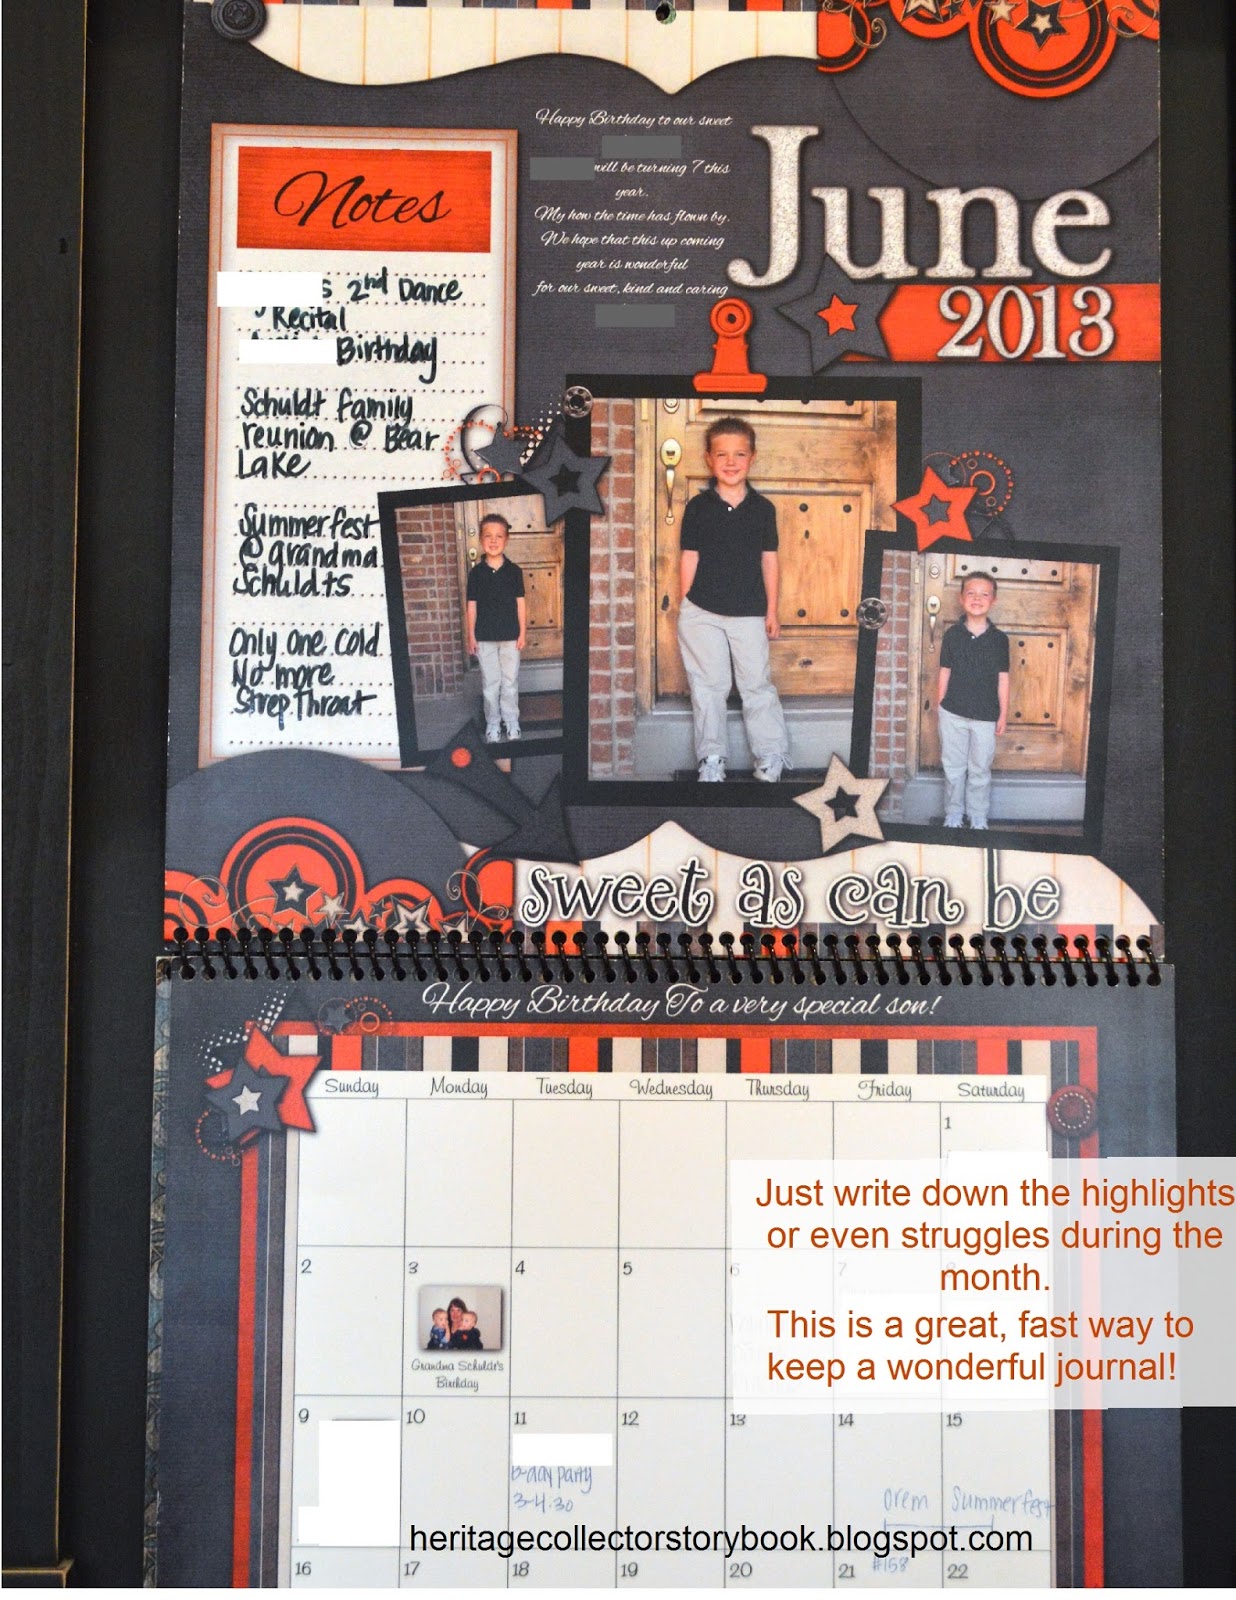
While we my kids were busily engaged in their fun activities, I was busy shooting video that will later be tagged to some of the photos you see here. The photo collection with photos will later be given to my children when they get older to cherish and hopefully pass on to their children.


These were the materials I used for the activity night.
  • Three ring binder to file what we did for the evening.
  • Coloring page I made of the ancestor we were spotlighting.
  • The game Jacks. This was one of our spotlighted ancestor's favorite game as a child.
  • A short description of the ancestor with pictures.

This book will be something my children will get a chance to study and continuing to learn from for years to come.

 
Fun easy coloring page I made using Heritage Collector Storybook. Took about 10 minutes to make.


A game used to spotlight as a fun activity. (yes for those in the family, I did change her name for protection)


What will be filed away for safe keeping. All of the coloring pages were filed behind the one you see here.
 
Thanks for visiting today! I hope you enjoyed this post. As always, I appreciate your comments and feedback! Leave me a quick note. :)


Saturday, September 7, 2013

Turning a regular wall calendar into a Journal!

Pin It

Like many of you, I am a super busy momma with a daily to do list a mile long. Feeling overwhelmed about journal keeping was last on my list!

 Keeping a journal or family history is vital! I know, you feel to busy, overwhelmed, stressed or all of the above. I have been in this place many times myself.

Many years ago I got the idea of making a personal calendar for myself. I added pictures of my kids, family events, birthdays, anniversary's and so on.  I loved seeing my sweet children's faces displayed on my calendar as I walked passed it many times during my day.

Though I loved seeing the pictures, I felt I needed to add more. As my days grew even more busy, my to do list even longer, I so badly wanted to keep a family journal but felt just like you. "How in the world am I going to fit one more thing in my already jam packed day"?  I thought to myself.

The answer was really quite simple. Just jot down a few really important things about my day, week or something important during the month on my calendar! 
On the top portion of the calendar I write down specific things I want to remember. For example, cute statements my kids have made, Goals that have been met, Illnesses, Struggles and victory's.
On the bottom portion of the calendar, I document birthdays, anniversary's dance recitals and important events.


I didn't just reserve my calendar journal for happy events, I documented illnesses, and a few struggles as well. This made my record keeping a REAL family experience. As I have looked back, I have really appreciated seeing ALL that my family has been through over the past year.

This little project has really been a rewarding experience. It has really made me take a good look at my day to day activities a little deeper. I have even simplified as well.

I challenge you to try this! It's a wonderful rewarding, simple way to keep a journal. You don't even have to make your calendar (though it does make it more personal when filed away) you can use a store bought one.  Just document your memories! They are to precious to have them slip away to be forgotten.


You can then add your own pictures and text to personalize. Keep in mind Heritage Collector templates are only compatible with Heritage Collector software. If you would like to learn more about the calendar module, Click here.
 
Thanks for stopping by!! I hope you will come back very soon. -Kathleen


Tuesday, September 3, 2013

The importance of Backing up your photos.

Pin It
This was an experience I will never forget.
I experienced this first hand last summer.

Friday morning began like any other summer morning.
I got up, and started on my daily routine. Got my babies their bottles, put them back in bed and decided to try and get some things done while my house was calm and quiet.

I hopped on the computer and started working. It was a little after 9am and I decided to check facebook for a moment.

As I was scrolling down and glancing at comments and pictures, a picture of a very large fire caught my eye so I decided to look at it.

To my surprise, the fire burning was at the top of my subdivision and I had no idea!

I quickly stepped outside. I looked up at what should be a blue sky, and gasped!

This picture was taken by my friend Shellee who lives just up the street from me.


As I saw and realized what was going on I ran back inside and told my children to get dressed quickly as we needed to go!

I gathered my children, some food and diapers and my external hard drive, laptop,  camcorder and a small box of pictures that hadn't been scanned into my computer yet.

As I sat in the car with my precious children, we decided to have a little prayer to help everyone calm down.

My children were crying and very nervous. We could hear sirens blaring close by, and cars rushing by.

My neighbors were frantically doing the same things as us.

Keep in mind my husband was not home and was at least an hour and half drive away! It was my job to get my family to safety and keep them calm.

As I drove out of my subdivision there were cars everywhere. It was difficult to even get out! The city had a police officer directing traffic so we could get out safely.

The picture below was taken from my friend Deanna just up the street from me.


I decided to leave before the evacuations were official. But learned later that the official evacuations were put in place about 30 minutes after I left.

We were evacuated from our homes for about 30 hours!


When I arrived at my parents home, unpacked the kids and food. I was so incredibly relieved to know that I had the most important things in my life with me (other than my husband who was at work, but still safe.)

I was careful to back up my photos, digital scrapbooks, sound files,  and important documents to my external hard drive!

During my moment of panic I felt like my decision was quite simple as to what to take other than my children. My external hard drive! It had most of my most precious memories all safely backed up.

I did learn a lesson over these past few days about be prepared and not procrastinating my backing up process. This is something that is a continuous process and needs attention weekly.

I'm happy to report that no homes were lost and no injuries occurred.

I was truly blessed! Today I look at my home a little differently. I'm glad to be living in it!

This wildfire  burned nearly 6500 acres and threatened many homes. It was an event that was covered by national news.

As I drove  to see the aftermath, my jaw dropped. There were a few places where the fire was only about 20ft away from some homes!

Firefighters are truly heroic people! They put their own lives on the line to protect us. And for that, I am truly grateful.

Please make sure to back up your precious photos and documents! Learn from this. Don't wait!

You can learn more about backing up your photo here.

 -Kathleen

I have linked up with this fun blog. Check them out, HERE.

Monday, September 2, 2013

Are your photos Overwhelming you?

Pin It

Photo Management Suggestions


Tips from Marlo Schuldt
During the past fifteen years I’ve struggled with many strategies to preserve, organize and manage photos. I have many different types and sizes of photos including slides and newspaper clippings.
The photo above is one of many photos in my Olsen family photo collection. This photo represents an avoidable tragedy. The photo was taken about 1900 in Norway. These two beautiful young ladies are probably relatives. Unfortunately we may never know their names, where they lived and how they were related, No one took the time to write any information on the back of the photo. Hopefully I may find a relative who has the same photo with information.

Here are a few things I’ve learned about working with photos:

  1. Scan and save only the best quality photos. No one will be interested in looking at poor quality photos unless a photo is ‘one of kind.’ Refer to my blog about scanning recommendations so you don’t waste time creating poor quality scans. Eliminate duplicate photos. Pick and save the best photo when you have several similar photos.
  2. Photos without descriptive information are worthless. Sorry to be so blunt. Few people enjoy looking at meaningless photos. DO NOT copy photos into your computer without a plan. You will discover it’s easier to find photos in boxes than disorganized folders on your computer. See the next suggestion.
  3. Avoid organizing photos by names and dates. Maintain the context in which photos were taken when copying photos into folders. Use topical names for folder or collection names such as the occasion when photos were taken. For example, you take photos on a picnic or hike. Put all the photos taken during the picnic or hike into a folder named “Dry Canyon Hike” because that is the location where the hike occurred. For a graduation you might name the photo folder “Nathan Graduation 2009.” Photos of my great grandfather’s rock home are in a collection called, “Carl Steen’s Rock Home.”Do not break up photo albums. Scan photos into categories (folders) similar to the pages in the album. This will maintain the organization that was used to create the album. For example, you may discover the photos on an album page were all cousins. Studying the photo grouping of album pages and sections may reveal other hidden information.
  4. Add oral narrative and stories to photos. Next time you visit your grandparents ask to see their photo album. Be prepared to hear fascinating stories of their history that you’ve never heard. Don’t forget to ask about how they met, courted, and married. Old photos were expensive and usually taken for a reason, Your challenge is to discover the story hidden in each photo. Record the stories and information with a tape recorder or digital voice recorder. Associating oral narrative with a photo is priceless, enhances meaning and really brings a photo back to life. 
  5. Keep Information within the photo file. Use a computer software program to embed (store) descriptive text information and dates in the computer photo file. Improve your digital camera skills. Learn to take better quality photos. For more information, click this newsletter link.Avoid scanning promotions. If someone comes to your door and offers to scan and preserve all your photos – Smile and then RUN! All you will end up with is several DVDs and a big bill. Your photos will be preserved but without any of the descriptive information that makes the photo meaningful and valuable. There is still hope if you copy the images from the DVDs and use another program such as Heritage Collector to add photo captions and identify the people in the photos. Make new DVD archives of the photos and information. Note: Having someone scan and enhance your photos maybe helpful and save time if you do not want to scan your photos. Sort photos into groups so you will have some general photo organization when you receive the DVD photo collections


Thanks for stopping by! Come back soon! If you would like to learn more about Heritage Collector, click the link below.

Heritage Collector Website

Download the FREE photo organizing software here.

Framed Mini Calendar

Pin It

Mini Calendar

Like many of you, I am continusly on the lookout for great unique gift ideas to have on hand to give away for Birthdays, Special Occasions, Christmas and so on. And, I am just in the mood to do a little craft. Break away from the norm and get out my spray paint and sand paper.

This cute little calendar was inspired by my sister Terresa.  She found these really cute frames from a local craft store here in town. Terresa is very crafty and loves to be creative. Go, take a peek at her blog, HERE.

I designed these little calendars in the Heritage Collector Calendar Module.
Once I had the size figured out, they were really pretty simple to make and have a fun unique twist to them.

I create them in a 3x3 size then later added to an 8x10 so I could print right from home on card stock. And, they looked great! Plus, I only had to print out two pages.


Once I had them printed out, just cut, place in order, and you are ready to attach to your cute little frame!
 
To get the pages to stick together and work like a regular calendar that you just tear at the top. just add a smudge of hot glue or glue of your choice to the top portion.

Paint your frame any color you like! I like to use spray paint but you could really use any type of paint for this.
 
Then, just glue to the back or use double sided tape like I did.  This calendar was just placed over the top of the hole on the frame.

Here it is! I thought it turned out pretty cute. And, what a fun gift I will give at Christmas this year.


To learn more about the Calendar program I used to make this click HERE
 
Thanks for stopping by today! I hope you come back again really soon.


Friday, August 30, 2013

Tips on Scanning and Writing a Family History

Pin It

Some of the question's we get asked most often is how to scan and get the best possible scans.

Marlo has written an outstanding book to help you write your family history and also gives wonderful and very useful tips on scanning.

The Digital Family History Guidebook is easy to read and understand. Many photos and screen shots help walk you through each step of the process you are learning about.
You can find more information here. Digital Family Guidebook


Tips for getting the best quality scans. Scanning Checklist
  • Turn on scanner.
  • Place first photo at top right corner of scanner and align to corner guides.
  • Start Heritage Collector Professional Software.
  • Create collections. Collections can also be created while scanning.
  • Click scanner Icon at top left in Professional software.
  • Select scanner.
  • Click Preview button in scanner software to see photo.
  • Crop photo. Zoom in if necessary to make cropping easier.
  • Do photo enhancements - contrast, brightness, saturation, etc.
  • Set the target size to 8 X 10 inches (800 X 600 pixels).
  • Select Dots per Inch (DPI) from 150 - 400 DPI.
  • Finalize Scan (Click the scan button) Photo appears in Professional.
  • Type in photo caption and / or description.
  • Select Word Characteristics (optional).
  • Change scanning date to an approximate photo date (optional).
  • Enter GPS Coordinate if appropriate.
  • Select appropriate file type.
  • TIF - Color - Most universal (If you plan to do further enhancements to photo).
  • PNG - Uncompressed creates much smaller than TIF and a good alternative to TIF.
  • BMP - Color or black and white. Creates large file size even compressed.
  • JPG - smaller size for e-mail or web. Degrades with repeated saving / enhancement.
  • Select collection to store photo and click Accept button.
  • Place next photo at top right of scanner.
  • Click Scan button.
Here is a wonderful example of what you can find in the Guidebook:
Chapter 8 - Archiving and Preserving. Proper Care and Handling of CD/DVDs.


You can view a very useful movie tutorial on scanning.


Thanks for stopping by! See you soon with more fun tips coming your way.
 
Heritage Collector Website

Thursday, August 29, 2013

Using video clips with pictures!

Telling stories the fun way

Those of you that know me know I LOVE shooting video with my camera. It isn't uncommon to see me with my camera strap around my neck with my eyes always on the look out for that perfect moment to capture on my camera!

I love that I am able to directly import my photos and video clips all into one place. Heritage Collector. This is where I can organize and easily access my photos and video for easy sharing.

Now, I know it is  nearing the end of summer. But, I want to show you just how easy it is to take family vacation pictures such as these, and turn them into a story to share.


This was my first time taking all of my kiddos ice fishing. I'm not going to lie, I was a bit nervous until my sweet hubby kept reassuring me it was safe. Goodness, the ice was several feet thick!

When you look at this picture, you know very little about it. The only thing you know right off is that is was winter and cold outside.

What you probably didn't know was that we were ice fishing! You don't know my kids ages, how excited they were, and all the fun that happened that day.  You didn't even know they pulled each other around the ice on their sleds.

Since I do like to scrapbook (or as I like to call it, Storybooking) I created a basic page with all of my favorite pictures from this trip in Heritage Collector Storybook.

 
Adding Video Clips to photos and storybook pages
 
Now comes the fun part! As I mentioned in the beginning, I always take video along with still pictures anywhere I go. When you mouse over this picture, I tagged the video clip to it so it plays! 

This is a snip of the above picture with video added to it. Now, In my opinion you have a much better recipe for sharing a fun story your kids will love!


I must admit I have spoiled my kids. They think every picture or scrapbook page should have their audio or a video clip attached! Their excitement as they mouse over their pages is so rewarding.
 
The possibilities are endless here. Childs first steps picture AND video attached to each other. Wedding video's and pictures attached. You see where I am going with this.
 
Stop just saving your pictures. DO SOMETHING WITH THEM!!

We teach live online free classes on how to do this. And you will be so amazed at how easy this is with Heritage Collector!

Saturday, August 3, 2013

FREE online Scanning class.

Scanning for Better Results

 It's easy when you know how - We are going to show you HOW!

Thursday, August 15th. 7:00 PM MDT
 
6:00 PM - Pacific
7-8:00 PM - Mountain
8-9:00 PM - Central
9-10:00 PM - Eastern


Take your history to the next generation with Heritage Collector Suite.
Organize photos and information. Personalize and create interactive storybooks, talking calendars, slide shows and multimedia collections. Increase interest with photo labels, oral narrative and GPS maps. Share via cloud, self-running CD/DVDs or printing.    
 
Free Download of Heritage Collector Standard.
If you don't own a copy of Heritage Collector, download our Free Standard version Here!  Try out the software and come to the class with any questions you may have. Can't wait to see you there.

Tuesday, July 9, 2013

Great gift ideas made digitally.

Happy Tuesday!

I have been one busy lady. We have been camping, to a family reunion, celebrating the 4th of July and taking day trips with my children.

This summer has been awesome! I'm finally well and able to spend some good quality time with my family.

Okay, I have some really run projects to share today! I've been wanting to share them for weeks but as I listed above, I haven't had much time to blog lately.

Hand crafted notebook gift set, magnet packs, note pad set

I love to craft. I love to feel like I can express my creativity. As my family has grown, and my responsibilities have more than tripled, I still have a need for a creative outlet. I have also found that I love to craft with the ease of my computer mouse! It's not messy, and I can't mess it up on the first try. My love for the program Heritage Collector has really made it possible to complete my projects, spend less money and time on them.


 Super cute double note pad set.
All I needed was two 3x5 plain note pads a cute cover that I designed in Heritage Collector that I glued to the backs of both the note pads so when you open it, your ready to start making notes. And, of course a matching pen, cute bow and tag. Perfect for gift giving.

As you can see, I have been busy. I just finished up a craft fair and these are some of the items I sold. All made using Heritage Collector Storybook. The most fun of all was the packaging up of the items and making them look cute enough to sale.
The graphics I used to make these came from Designs by Krista.
 
Come back soon. I am busily working on some projects I can't wait to share with you!